How Do Glue-In Hair Extensions Be Installed
For people who rarely use wigs, the intrigued confusion of how glues can help hair extensions stay on top of people’s heads well is yet to be answered in detail. Having a solid understanding of how hair weaves are glued can be helpful for people who are hesitant about whether they should get hair extensions or not. This blog will be a step-by-step guide for glue-in hair extensions.
How To Glue In Hair Weaves/ Hair Extensions
Step1: Choose the right extensions/wefts
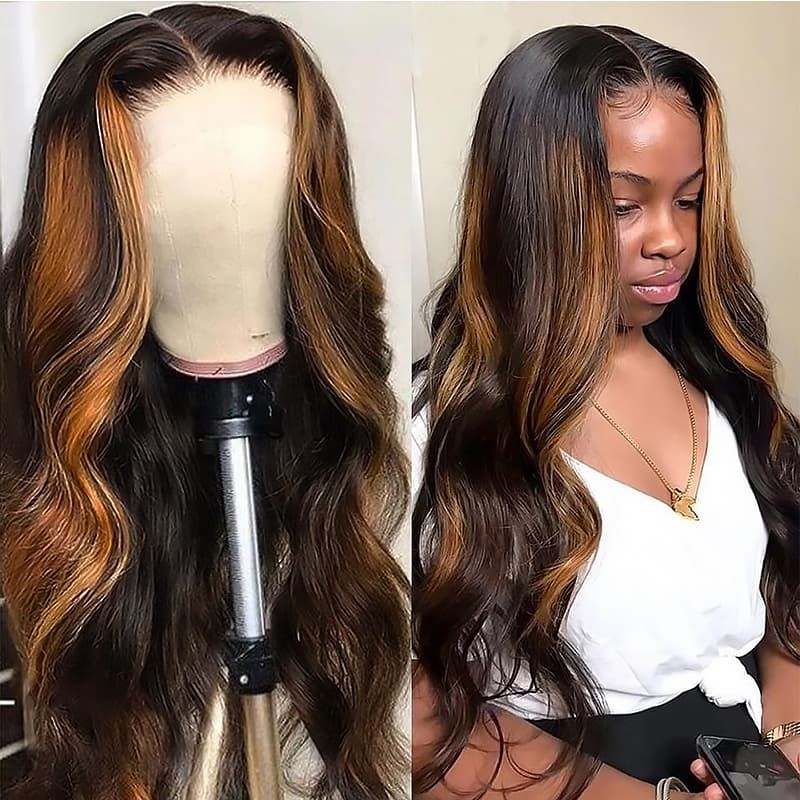
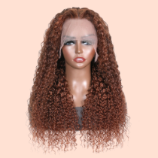
The important thing to remember here is to choose hair weave bundles made from human hair. Because synthetic hair looks unnaturally shiny and won't blend as well into your natural hair color, so it is highly recommended the uses would go for extensions made out of 100% premium human hair(virgin hair). And also chose extensions made with hair that is closed to your current texture.
Talking about reasons why synthetic hair extensions are not that good, In addition to not looking as natural as human hair, synthetic hair can harm users’ wellbeing. For the first time uses, uses synthetic hair may lead to an allergic reaction, and much synthetic hair cannot be With extensions, you get what you pay for. You don’t have to spend a fortune, but you’ll get a more natural result if you save up for higher-quality wefts. Human wigs will also last longer than synthetic hair extensions.
Step2: Select the right glue
Talking about glue selecting, specific glues made for wig uses are recommended over ordinary ones. And glues shall be selected according to the color of extensions and that of the users’ hair. Normally white bonding glues pairs better with light colors, and black glues go better with darker colors. It is important that others cannot tell if you used hair extensions or not, and choosing the right glue will not only make your extensions stay longer on your head and also much more firmly. Besides, the right type of glue boosts the level of naturalness greatly. And you are unsure about which glue to go with, also consult someone with the required expertise, for example, the customers’ service team at incolorWig
Step3: Adjust the length of the extension
Hair extensions are served in different lengths, although the length can be chosen within a range at the purchase stage, the targeted exact difference on a case by case basis. Therefore, trimming is inevitable sometimes. Here is how people normally trim their hair extensions.
Hold up the targeted extension so that it stretches naturally. Mark the wanted length with your finger and cut it with sharp scissors. If the extension is only used for adding some extra volume then the targeted length would be the same as your original hair.
Step4: Dyeing and coloring(optional)
Firstly, do not attempt to dye synthetic extensions, because they cannot be dyed. The reason why dyeing is optional lays in the fact you should only considering dying it if the color is not as expected. Whether it is way too different from your original one, or if it is not what you have hoping for. Otherwise, try to go with the out-of-box colors. You would similarly dye your purchased hair extensions as how you would do your original hair. Lay them flat and apply the color evenly and match the color to the ends of your hair, not the color of the roots. Expensive extensions shall be dyed by experienced hands, so try to reach a professional for advice before start doing it yourself.
Step5: Jobs to be done before putting on the extensions
Your original hair shall be thoroughly washed and conditioned to keep them healthy. It is important to wash your original hair thoroughly because glues would perform better with hair free from oils. Shampooing and air-drying your original hair thoroughly helps to remove any oil or bad smells. Also focus on the parts of hair they will be covered by/or blend with the extensions, applying enough conditioner to keep them moistened is the key to keep them healthy
Completely dry your hair before using any extensions. Then gently detangle your hair with combs of closely-parted tooth. Comb your hair from the roots to the ends and repeatedly and do the same to the extensions( Curly hair shall be combed and detangled before being dried)
Step6: parting and installation
Depending on which part of your hair is needs to be extended, parting of your original hair also differs. Generally speaking, a rat-tail could be helpful, comb to draw a line on whichever side of your natural hair parting before clipping them up to the top of your head. The clipped hair should be concentrated to the middle or at the center of the top of your head. If you prefer a side part, the clipped hair should be placed to the sides
If you want to add some extensions to the backside of your original hair, comb to make a U-shaped part above the nape of your neck and try to make the parted line as clear of hair as possible. Because the parted line will be used to glue the extension, make sure that they are cleared, avoid any hair from being polluted by the glue. It is important to leave a section of hair(stretching from ear to ear and above the nape of your neck) which will later function as a hide to the track of your extensions.
Limit the track length and width so that it fits the parting you made before. Cut any excessive part of the track. Apply glue evenly to the track and use a blow drier to dry it to an appropriate extent (enough glues should be left on theft but no glue should drip off and the blow drier used should be on a cool setting)
Press and install the extension onto the hair a little bit below the left parting spaces. Avoid applying any glue on your scalp. Once any hair extensions are installed, blow-dry the track again for about 1 minute to make it firmly attached. If needed, another part can be drawn above the first one on which another track can be applied. Undo all clipped hair and check your new looking.
Recommend Posts
Different Hair Types for Hair Weave